Showing posts with label Cricut. Show all posts

Sunday, December 29, 2013

Relax to the Max


That's what I'm doing...relaxing to the max.  That's what winter breaks are for, right?!

I decided to ink up Whipper Snapper Designs "Relax to the Max".  Isn't this just the cutest image?  I stamped it with Memento Tuxedo Black ink onto X-Press It cardstock.  I colored it with Copic markers and cut around the image with detailed scissors.

The layers of this card are made with patterned paper from Queen & Company, kraft, white and black cardstock.  The paw print was something I made with my Cricut that was just hanging out in my stash for the longest time and the flag was made with a MFT die-namic.  I added a button and some hemp cord.  Some of the corners were rounded with a corner punch.  A little sponging around the edges with Distress Ink Brushed Corduroy happened too.

Thanks for visiting my blog!  Hope you can find some relax to the max time too!

Wednesday, November 28, 2012

Santa Paws


 It's Wednesday, which means it is time for a "What If? Wednesday Sketch".  You have two weeks to enter your card using the sketch posted on the Repeat Impressions blog...The House That Stamps Built.  All participants will have a chance to win a $25 Repeat Impressions gift certificate.  I hope you'll play along with us.

This week's sketch looks like this:


As you can see, I was rather liberal with my sketch interpretation.  I tilted the sketch by 90 degrees.  I changed the banner-like strip to a bone (cut by my Cricut with the "Paper Pups" cartridge), and I let the dog take the square's place.

I stamped the Repeat Impressions image of "Wagging Pup" (8106-I) with Marvy black dye onto X-Press It cardstock.  I colored the dog with Copic markers and cut around the image with my Cutterbee scissors. I added the Santa hat to the dog, by cutting red and white paper from a Memory Box die.

The bone was cut from kraft, and the large layer of patterned paper is from Bella Blvd, rounded with a corner punch and framed with kraft paper.


Want to see some more cards using this sketch?  Just head on over to the following Rock Stars:

 Thanks so much for visiting my blog today!


Wednesday, September 26, 2012

Heart Air Balloon


Love is in the air.  Or at least a definite chill is the air around here.  Cardmakers always rush the seasons, and so look at me jump to Valentine's Day, LOL!

Time for another Designer's Choice Challenge at Repeat Impressions. Rock Star Patti Gilliam challenged us to use the technique of paper piecing with a Repeat Impressions image. To do this I grabbed the Repeat Impressions image of "Heart Air Balloon" (9114-I) and stamped it with Marvy black dye onto a piece of Echo Park patterned paper.  I cut out the heart portion for paper piecing.

Then using the Cricut Paper Pups cartridge, I cut two clouds from Georgia Pacific cardstock.  I pop-dotted the smaller cloud onto the larger one.  Then I stamped "Heart Air Balloon" (9114-I) again with Marvy black dye directly onto the larger cloud.  I then adhered the image on the Echo Park patterned paper onto the cloud.  I tied a small bow onto the balloon using Baker's Twine.

I stamped a portion "Love Is In The Air" (9103-G) using a Memento Tuxedo Black marker directly onto the larger cloud.  I added a small pink rhinestone next to this sentiment.  Then, I added many pearls using my Ice White Pearl Pen.

Then I made my creation into a shape card by tracing my clouds onto a folded piece of cardstock.


Want to see some more paper piecing?  Just soar on over to the following Rock Stars:
Have a wonderful day.  And don't worry, you have many, many days before you need to run out and get a Valentine.  Now, back to the season of fall.
 

Wednesday, September 5, 2012

Moonlight Ride


It's Wednesday, which means it is time for a "What If? Wednesday Sketch".  You have two weeks to enter your card using the sketch posted on the Repeat Impressions blog...The House That Stamps Built.  All participants will have a chance to win a $25 Repeat Impressions gift certificate.  I hope you'll play along with us.

This week's sketch looks like this:


Though at initial glance it may appear like I am still being a sketch rebel, but really not so much this time around.  I stamped the Repeat Impressions image of "Halloween Witch" (817-I) onto a X-Press It cardstock.  I colored her with Copic markers and cut around the image. 

I brayered and sponged the "moon" with Adirondack Lemonade, Adirondack Sunshine Yellow and Marvy Ochre dye inks.  I made a couple streaks onto the moon with a gray Copic marker.  Then, all over the moon, I sponged some Brilliance Moonlight Pigment Ink onto the moon to give it some light shimmer.

The "sky" is made with a panel of texturized paper from K&Company.  Then, with the Mini Monsters Cricut cartridge I cut the two black trees and placed them into my spooky night scene.  I added some Baker's Twine for the finishing touches on this card.

My first Halloween card of the season.  I think Halloween cards are a blast to make.  I know it won't be my last time using this cute little witch, that's for sure! Stayed tuned for more witch flights, LOL!

In the meantime, make sure you visit the other Rock Stars.  They have some great interpretations of this sketch.  You'll love each and every card!


Thanks so much for stopping by my blog today!

Wednesday, August 22, 2012

Up, Up and Away

It's Wednesday, which means it is time for a "What If? Wednesday Sketch".  You have two weeks to enter your card using the sketch posted on the Repeat Impressions blog...The House That Stamps Built.  All participants will have a chance to win a $25 Repeat Impressions gift certificate.  I hope you'll play along with us.

This week the sketch looks like this:

I don't know.  Sometimes I feel like such a sketch challenge rebel, but I do always start with the sketch and the very best of intentions.  If you look closely, you will see the white cardstock clouds I made with my Cricut Paper Pups cartridge.  I arranged them onto a piece of light blue glossy cardtock like the arrangement on the sketch.  I just had to bunch the clouds up some more so they would look a bit more realistic. I also pop-dotted a couple of the clouds.

Then I stamped the Repeat Impressions image called "Hot Air Balloon" (9113-K) with Stazon Jet Black directly onto this light blue glossy panel with the clouds.  I stamped the image again with Marvy black dye ink onto X-Press It cardstock and colored it with Copic markers.  Then I cut the balloon part of the image and placed on top of my image stamped with Stazon Jet Black.  I omitted the three embellishments at the bottom, and instead added some Baker's Twine to the top of the card.

All corners were rounded, and the card panel was framed with black cardstock.


My school year official takes off today...up, up and away.  I sure hope it is a good one.  Understand that the next few days for me will be sleep and first grade.  That's it.  No stamping. (boo-hoo!)

Make sure you visit the other Rock Stars for some more sketch interpretations. They truly are sketch scholars, unlike myself:

Monday, July 2, 2012

Here's to you America

It's Monday! What better way is there to make a Monday more bearable, than with a Stamp of the Week from Repeat Impressions? This week’s SOTW is the sentiment "Here's to you America" (3703). The SOTW is available exclusively to Repeat Impressions blog readers at 50% OFF with the special discount code from Monday, July 2 to Sunday, July 8. To get the discount code and more information about the SOTW, please go to the Repeat Impressions blog, The House That Stamps Built.

For my card, I used patterned paper from The Paper Studio and Bo Bunny to form the layout of the card.  I framed these panels with black cardstock.  Using a Nestabilities die, I cut the scalloped edge from white cardstock. The stars were made with my Cricut and the cartridge George & Basic Shapes. A sheer white bow was tied around the card.

And, this week's SOTW was stamped using Versafine Onyx Black pigment ink.

 Please take a look at some of the other creations the Rock Stars made using this week's SOTW.
And a very special thanks for visiting my blog today.  For those of you getting ready for the upcoming Fourth of July holiday...stay safe and have fun, and remember the reason why we celebrate.

Sunday, July 1, 2012

Beach Dachshund

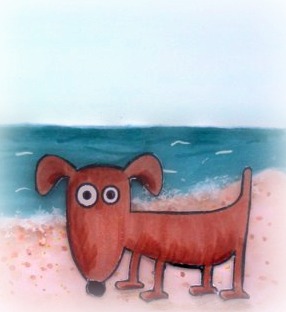
I keep making beach cards because I find them so relaxing to create.  This time around, the Rubbernecker image of "Dog" (SKU:569-18) begged me to put him in the beach scene.  Who am I to object to such a request?

And, it just so happens that this request fits July's Rubbernecker Stampin' Sisterhood challenge perfectly.  Here is the inspiration photo:
I stamped the adorable little dachshund with Marvy black dye ink onto X-Press It cardstock.  I colored him with Copic markers.  I cut around the image with my Cutter-bee detail scissors.

I then cut a piece of X-Press It cardstock with a Nestabilities die and used Copic markers, a white Uni-ball Signo gel pen, and FlowerSoft to create the beach setting for the card.  I drew the birds in the distance with a Memento Tuxedo Black marker.  I paper pierced around the image panel.

Using my Cricut and the cartridge Life is a Beach, I cut the crab using creme cardstock..  I sponged around the crab with Adirondack Latte dye ink, and used the Uni-ball Signo gel pen and Memento Tuxedo Black marker to add the crab's eyes.

I paper pierced around a panel of Bo Bunny patterned paper. I faux stitched with a colored pencil.  I placed the beach scene, complete with the dachshund and crab onto this panel.  I framed this panel with creme cardstock.  I added Caribbean Baker's Twine around the card, tied a bow and added a brown button for the finishing touches on this card.

I've got to share with you the reason I put the crab into the scene.  Earlier last week, I discovered this adorable video that has gone viral....watch this!


Makes me wonder what Sloopy would do on the beach, LOL!

Sure hope you can join us this month on for the Stampin' Sisterhood Challenge! Head on over to the blog and check out all of the details. Though you aren't going to win a trip to the beach, you could win a stamp set from Rubbernecker Stamps!

Wednesday, June 27, 2012

Pork of July

(If you are looking for today's Repeat Impressions sketch challenge scroll down, or click here. )

 It isn't even July yet...and look at me, a Fourth of July card!  Woot! And two posts in one day...Double Woot!

This card represents one of the reasons I love Hambo Stamps!  Their sentiments just crack me up, and the one on this card is no different.

For this card, I used the Hambo image of "Uncle Ham" (3419) by stamping it with Marvy black dye ink onto X-Press It cardstock.  I colored the image multimedia style with Copic markers and Caran d'Ache color pencils.  I used the out-of-the-box technique to let the flag hang out from the image panel.  Polar White Flower Soft was used on Uncle Ham's beard, and some Crystal Stickles add some sparkles to the sparkler. The image was framed with black cardstock.

I used my Cricut George and Basic Shapes cartridge to cut the stars from black and white cardstock.  I adhered small bows of Maraschino Baker's Twine to these stars.

Patterned paper is from Bo Bunny and is framed with black cardstock. Small ric rac from white cardstock was cut with a Nestabilities die.  The layout is inspired by today's Sketch Challenge on Splitcoast, SC#391.

The Hambo sentiment "Pork of July" (3416) was stamped using Versafine Onyx Black Pigment ink.


Thanks so much for visiting my blog.  So hard to believe the Fourth of July is next week.  Yikes!  What has happened to my summer?  Wishing all of my fellow American readers a happy holiday.

Sunday, March 18, 2012

Stampin' Sisterhood, Pupcake


It's Sunday! Time for another Rubbernecker Stampin' Sisterhood Challenge! Remember, if you play along with us this week, you will have chance to win a FREE STAMP from Rubbernecker and be queened Sunday Sister. And, at the end of each month, all the month's Sunday Sisters will be put in a random drawing to win a STAMP SET from Rubbernecker Stamps! Head on over the the Stampin' Sisterhood's blog for all of the details.


This week, we have an inspiration photo:


This photo made me think of the "pupcakes" I buy from Three Dog Bakery for my dachshund, Sloopy. She absolutely loves them, so I decided to recreate a paper version (even though I am certain Sloopy would have preferred the real thing!).

I stamped the Rubbernecker image of "Dog" (SKU: 569-18) onto X-Press It cardstock. I colored it with Copic markers and then cut around the image with my Cutter-bee scissors. I set this aside for the time being.

I then began construction on the "pupcake". I used the Cricut cartridge "Sweet Treats" to cut the cupcake image. Patterned paper from The Paper Studio, Making Memories, off-white cardstock, and pink cardstock were used to form the various layers on the cupcake. I sponged lightly with Distress Ink Spun Sugar on the candle, Vivid Butterscotch dye on the flame, SeaShells Sandal dye on the cupcake, and Adirondack Sail Boat Blue on the cupcake liner. I highlighted some of the cupcake with Crystal Stickles. I adhered some some bone charms on the cupcake to appear as sprinkles.

I then merged the cupcake with the dog to create my "pupcake".


Thanks for stopping by my blog today. Be sure to visit the Rubbernecker Stampin' Sisterhood Blog for more inspiration, along with all the details for playing along with us this week.

Wednesday, March 14, 2012

Let the Madness Begin...


Yesterday I had the honor of posting the weekly installment of "Tuesday's With the Team" on the Rubbernecker Stampin' Sisterhood blog. Here's the card I shared:

Are you ready for March Madness? I am! Starting tomorrow I'll be glued to my television whenever I can, cheering for all of the underdogs and for my beloved Buckeyes in the NCAA Tournament.

Because of this, I thought it might be fun to make a card for the event that I truly do consider a March holiday. I stamped the Rubbernecker image of "Sneaker" (SKU: 69-10) with Marvy black dye ink twice onto X-Press it cardstock. I colored both with Copic markers and then cut around the shoes. I merged the two together to appear as a pair of basketball shoes.

To make the basketball, I cut two circles on my Cricut using the George and Basic Shapes cartridge, one with orange cardstock and one with black cardstock, with the black circle being cut using the shadow feature. I sponged some Adirondack Sunset Orange onto the orange cardstock. I then drew some lines lightly with a pencil onto the orange circle where I wanted my black lines to appear on the ball. I cut along these lines, and then ran the orange pieces through a Cuttlebug embossing folder. I arranged the orange textured pieces onto the black circle allowing some separation between the pieces so that it would appear like the black lines on the basketball.

I printed a tournament bracket and cut it into a panel. I paper pierced around the panel and framed it with black cardstock.

After placing the basketball and sneakers onto the bracket panel, I added an Ohio State logo sticker and sentiment flag to the card. I highlighted some of the teams on the bracket with a Copic marker.

I hope you enjoy the upcoming NCAA Tournament, and I hope your favorite team goes deep into the tournament. And, yes...I realize I just totally jinxed Ohio State.


Enjoy the madness and thank you for joining us today for "Tuesdays with the Team"...be sure to visit the Stampin' Sisterhood often for more Rubbernecker inspiration, challenges, and fun!

Friday, December 30, 2011

Oh No!


I got the idea for this card from a card on Zazzle. It made me laugh, so I knew I had to try and replicate that humor.

I decided to use Rubbernecker's "Blake" (SKU:593-01) for the snowman image. Using a Tuxedo Black Memento marker, I inked the image (leaving off the sign Blake carries). I stamped the image onto Neenah Classic Crest Solar White cardstock. I then placed a Post-It mask of Blake and snow onto the cardstock and brayered the following dye inks: Vivid Bermuda Blue, Adirondack Sail Boat Blue, and Adirondack Stone Washed. After removing the masks, I colored Blake with Copic markers, and then added a line of Crystal Stickles on the ground.

With a brush, I added many snow flakes (dots) with Copic Opaque White.

The sentiment is computer generated. I used my Cricut (George and Basic Shapes) to get a template for the speech bubble.

I placed a panel of acetate over the square scene I created.

Sheer white ribbon and a snowflake ribbon put the finishing touches on this card. The image is framed with black and blue cardstock.

Thanks so much for visiting my blog today!

Thursday, December 29, 2011

Texting SNOW


Hope you don't mind another card with Rubbernecker's "Zac" (SKU 596-01) on it. He is a cutie, after all.

I got the idea from two actual Christmas cards I received this holiday season...both which were long, tall cards that spelled the word "SNOW" on them. One of the cards used a snowman for the letter "O". So, I guess you can say I am CASE-ing my mail now.

To make this card, I stamped the image of Zac onto a piece of Neenah Classic Crest Solar White cardstock with Marvy black dye. I colored the image with Copic markers. Then, I proceeded to color over Zac and his bird friends with a Versamarker and used clear embossing powder to heat emboss over the image. This created a mask.

I then proceeded to brayer the following dye inks onto the cardstock to create the sky and horizon line (which was made with a torn Post-It note): SeaShells Seashell Pink, Vivid Bermuda Blue, Adirondack Sail Boat Blue, and Adirondack Stonewashed. I added some Crystal Stickles at the horizon line. I then sprayed the entire card with Tsukineko's Frost Sheer Shimmer Spritz.

With my Cricut and the "George and Basic Shapes" cartridge, I cut out the letters of S-N-and-W using blue cardstock. I placed these letters onto the scene, spelling "SNOW", allowing Zac to be the letter "O".

Using Copic Opaque White and a paint brush, I added snowflakes to the scene, and painted some fallen snow on the letters. The card is frame with white and blue cardstock.

A sheer white ribbon and a snowflake brad complete the card.

Thanks so much for visiting my blog today. I have another card in my mind using Zac...and so I'm thinking why put away these inks and the image before I make it? Check back real soon...providing that I pull it off, it will be my warped sense of humor at work again.

Sunday, December 25, 2011

Rockin' Around The Christmas Tree


Rockin' Around the Christmas Tree. Yes, that song has been in my head ever since I saw a recent documentary on the band Chicago. They recorded a new Christmas album and this song is on it. So, there is no surprise at all that the song served as inspiration for this card.

I stamped the Rubbernecker image of "Ethel and the Group" (SKU:562-10) with Marvy black dye ink onto X-Press It cardstock. I colored it with Copic markers, and then cut around the image with my Cutter-bee scissors.

The Christmas tree image was cut from green cardstock with the Cricut using the cartridge Christmas Cheer. I then dry embossed the image using a Cuttlebug embossing folder and sponged around the tree using Adirondack Lettuce dye ink. I decorated the tree with Jolee's dimensional sticker lights, Viva Decor Pearl Pens (Ice White and Red), Baker's Twine, and Tsukineko's Frost Sheer Shimmer Spritz.

Patterned paper from Amscan was used to create the card panel and red cardstock frames this panel. I paper pierced around the patterned paper, as well as added dots from the red Pearl Pen.

The sentiment is computer generated.

(Click on the photo to view larger)


Thank you so much for visiting my blog on this Christmas Day. Wishing you all happiness, health and hope this season. Rock on!

Monday, December 5, 2011

Tag, You're It!


It's Monday! Time for another challenge from the Outlines Challenge Blog! This week the challenge is to make a tag or two using Outlines images that could be used on holiday presents. Make sure you play along with us this week for your chance to win a $25 gift certificate from the Outlines Rubber Stamp Company.


I was able to make two tags for this challenge. Both were made using the Outlines images of "Wavy Poinsettia Large" (I-981), "Wavy Poinsettia Medium" (H-982), "Wavy Poinsettia Small" (E-983) and the sentiments from "Posy Winter Greetings" (F-1124). I stamped all with Marvy black dye ink onto X-Press It cardstock. I added color with Copic markers. The largest poinsettia was actually colored green for the poinsettia leaves, and the small and medium poinsettia images were used for the actual petals of the poinsettias. I did do some highlighting with a white gel pen and added some shimmer with some Pebbles Pearlescent Shimmer Chalks. I cut around the images. Some Stickles were added to the center of the flower.

Patterned paper from My Minds Eye was cut by the Cricut into tags using the George and Basic Shapes cartridge. Lace, sheer ribbon, and gold ribbon were added to the tags for the finishing touches. I paper pierced around one of the tags, and faux stitched with a white gel pen.


Make sure to visit the blogs of the design team to get some great ideas for gift tags.

Jeanne Streiff
Jenny Gropp
Lisa Silver
Robin Kirkpatrick
Sandy Hulsart
Sue Kment

So glad you had the chance to visit my blog today. Have a terrific week!

Sunday, November 27, 2011

Stampin Sisterhood, Hot Diggity!


Sundays are a very special day over on the Rubbernecker Stampin Sisterhood blog. Each and every Sunday, Sisterhood Challenges are issued. Participate for your chance go win a FREE STAMP from Rubbernecker and be queened Sunday Sister. At the end of each month, all the month's Sunday Sisters will be put in a random drawing to win a STAMP SET from Rubbernecker!


This week, we have a sketch challenge.


For my card, I flipped the sketch. I stamped the Rubbernecker image of "Dog" (SKU: 569-18) with Marvy black dye onto X-Press It cardstock. I colored the image with Copic markers and cut around the image.

I then used my Cricut and cut the bag of bones and bone using the cartridge of "Paper Pups" from black and white cardstock, and patterned paper from Bo Bunny. I added some Baker's Twine to the bag.

For the card's panel, I paper pierced around patterned paper from the Paper Studio, and framed it with black cardstock, and patterned paper from Bo Bunny.

I used three little dog paw brads in the upper corner, and stamped the Rubbernecker sentiment of "Hot Diggity" (SKU: 568-11) with Versafine Onyx black.


Thank you for visiting my blog today. I hope you get a change to play along in the Stampin Sister Challenge this week. For more design team inspiration, and for further details, make sure you visit our Stampin Sisterhood Blog.

Monday, November 14, 2011

Thanksgiving Blessings

***If you are looking for the Rubbernecker Holiday Hop...just click here.


It's Monday! Time for another challenge from the Outlines Challenge Blog! Thanksgiving is next Thursday here in the US, and this week we are using Thanksgiving as our challenge theme. Play along with us this week for your chance to win a $25 gift certificate from theOutlines Rubber Stamp Company.


For my card this week, I used one of the new Serendipity images from Outlines, Cinderella Mini (F-1205). I stamped the image onto X-Press It cardstock with Marvy black dye ink. I colored the image with Copic markers and added some highlights with Coloursoft pencils. I cut the image panel with a Nestabilities die, and did some paper piercing around the die cut shape.

Then using patterned paper from We R Memory Keepers and Heidi Grace Designs, I formed the layout for this card. Paper piercing was done around the larger We R Memory Keepers panel, and the strip of Heidi Grace paper was run dry embossed with a Sizzix folder. The card was framed with brown cardstock.

Sheer brown ribbon and lace were added to the card, as well as a leaf cut from brown cardstock using the Cricut cartridge, "Elegant Edges".

The sentiment is also from Outlines. It is a portion of the Split Layering Collage - Blessings (H-794). It was colored with Copic markers.


Along with my health and family, I am grateful to have the chance to be on such a talented and kind Outlines Design Team. Go and see what wonderful creations they have to share.

Jeanne Streiff
Jenny Gropp
Lisa Silver
Robin Kirkpatrick
Sandy Hulsart
Sue Kment

And, I am thankful you took time today to visit my blog. Have a terrific week!

Monday, October 31, 2011

Something to Crow About


It's Monday! This week's challenge from the Outlines Challenge Blog has us making creations with the theme "Friendly Fliers". Outlines has such wonderful images, and when I saw this cute little crow sitting on the scarecrow's arm, I knew I had to make him my "Friendly Flier". Especially, since today is Halloween. Seemed perfect. I hope you join in on this fun challenge this week. You can win a $25 gift certificate from the Outlines Rubber Stamp Company if you do.


I stamped the image called "Scarecrow" (G-1098) onto X-Press It cardstock using Marvy black dye ink. I colored the image with Copic markers. Some paper piecing of the scarecrow's shirt was done using a piece of Lasting Impressions cardstock. A few highlights using an atyouSpica glitter pen was used also on the image.

Patterned paper from K & Company and Lasting Impressions make up the panels of this card, along with black cardstock. The larger panel was cut using the Cricut cartridge "Elegant Edges", thus making the crow in the corner, and the fancy edge. The crow's eye is simply made with a hole punch and a Memento Tuxedo black marker, his beak is a scrap of the Lasting Impressions patterned paper.

Using the Memento Tuxedo black marker, I drew some hand-stitching around the some of the panels. A black button completes the card, tied with mandarin orange Baker's Twine.

To me, this card looks a little "folk art-ish" with the black crows. Thanks for stopping by my blog today.


Make sure you visit the blogs of the design team to see some more friendly fliers.

Jeanne Streiff
Jenny Gropp
Lisa Silver
Robin Kirkpatrick
Sandy Hulsart
Sue Kment

Monday, August 22, 2011

Woof!


It's Monday! Time for another challenge from the Outlines Blog. This week, the challenge is pay tribute to our four legged friends by using animal stamps from the Outlines Rubber Stamp Company. Well, as soon as I told my dachshund Sloopy about the challenge, she insisted, of course, that I do something for dogs. Make sure you play along too this week, for a chance to win a $25 gift certificate from Outlines.


I decided to do a shape card for this challenge. With the Cricut cartridge, Paper Pups, I cut out the image of a bone and the shadow of a bone using patterned paper from Making Memories and off white/beige cardstock. I paper pierced the patterned paper.

I then stamped the "Split Layering Collage -Woof" (H-1064) with Marvy black dye ink onto X-Press It cardstock. I colored the multiple images within the collage with Copic markers. To add some bling, using Picksey Pick-Ups, I added some Swarovski crystals, Clear Size 9, to the fire hydrant, the flower next to the doghouse, and around one of the dog collars.

I placed my collage onto the bone, added the sentiment "To err is human..." (B-1081), along with a sheer light brown ribbon, and dog paw embellishments.

Make sure to see what the rest of the design team created for this Four Legged Friends Challenge:

Jeanne Streiff
Jenny Gropp
Lisa Silver
Robin Kirkpatrick
Sandy Hulsart
Sue Kment

Thanks so much for visiting my blog today. Sloopy says thanks too. "Woof!"


Sunday, July 31, 2011

One Year Ago...


One year ago today, at 5:48 pm, I married my sweet, sweet husband...in an old post office! So, to commemorate that special moment, here's the anniversary card I made for him.

The image of the calla lilies is from Rubbernecker's 2010 floral release. I stamped the image onto X-Press It cardstock with Marvy black dye and colored with Copic markers. I then cut around the calla lilies. I placed it inside of the postage stamp border, which was made using my Cricut, specifically the Sweethearts cartridge. The small heart was cut from a Nestabilities die, and I wrote "1st" with a Memento Tuxedo Black pen. The cancelled stamp image was custom-made for our wedding last year, complete with our names, date, and location of our wedding.

Patterned paper from Lasting Impressions, DCWV, and gold cardstock form the layers for this card. I used a white gel pen to dot around the larger panel.

July 31, 2010 was the best day of my life. I loved every second of it. It was truly like a fairy tale. Happy Anniversary, Chris!

LinkWithin

Related Posts Plugin for WordPress, Blogger...